How To Test Electrical Wires: A Comprehensive Guide For Beginners
Hey there, future electrician! If you're diving into the world of electrical wiring, testing wires is one of the most important skills you’ll ever learn. Whether you're troubleshooting a faulty connection, ensuring safety during renovations, or just trying to figure out why your lights keep flickering, knowing how to test electrical wires can save you time, money, and even your life. In this guide, we'll break it down step by step so you don’t get overwhelmed. So, grab your multimeter, put on those rubber gloves, and let’s get started!
Testing electrical wires isn’t as complicated as it sounds, but it does require some basic knowledge and the right tools. This isn’t just about flipping a switch or turning a knob; it’s about understanding the fundamentals of electricity and learning how to work safely around live circuits. Don’t worry if you’re new to all this—we’ve got your back!
In today’s world, DIY projects are more popular than ever, and electrical work is no exception. But before you start messing with wires, you need to know how to test them properly. This guide will walk you through everything you need to know, from choosing the right tools to interpreting test results. Let’s make sure you’re ready for whatever comes your way!
Read also:How Old Is Faith Hill Discovering The Age And Journey Of A Country Music Legend
Why Testing Electrical Wires Matters
Before we dive into the nitty-gritty, let’s talk about why testing electrical wires is such a big deal. It’s not just about making sure everything works—it’s about staying safe. Electrical hazards can lead to serious injuries or even fires if you’re not careful. By learning how to test wires properly, you’re taking a huge step toward preventing accidents.
Here’s the deal: electricity is powerful, and it doesn’t mess around. A single mistake, like touching a live wire without realizing it, could land you in the hospital—or worse. That’s why testing wires is a must-do step in any electrical project. Think of it as a safety net that keeps you and your family out of harm’s way.
Essential Tools for Testing Electrical Wires
Now that you know why testing is important, let’s talk about what you’ll need to get the job done. Having the right tools is crucial, and we’re not just talking about a screwdriver and some pliers. Here’s a quick list of must-haves:
- Multimeter: This is your go-to tool for testing voltage, resistance, and continuity. It’s like the Swiss Army knife of electrical testing.
- Non-contact voltage tester: This handy device lets you detect live wires without actually touching them. Super useful for quick checks.
- Insulated gloves: Safety first, folks! These gloves protect you from accidental shocks.
- Pliers and wire strippers: You’ll need these for cutting, stripping, and bending wires.
- GFCI tester: Great for checking ground fault circuit interrupters, especially in bathrooms and kitchens.
Having these tools on hand will make your life so much easier. Trust me, you don’t want to be halfway through a project and realize you forgot something important!
Step-by-Step Guide to Testing Electrical Wires
Alright, let’s get into the meat of the matter. Here’s how you test electrical wires step by step:
Step 1: Turn Off the Power
This is the most important step, and I can’t stress it enough. Always turn off the power at the breaker box before you start testing. Safety should always come first. Even if you’re using a non-contact tester, it’s better to be safe than sorry.
Read also:Henry Cavill As James Bond The Untold Story And Why Hes Perfect For The Role
Step 2: Use a Non-Contact Tester
Once the power’s off, use your non-contact tester to double-check that the wires aren’t live. Simply wave the tester near the wires—if it beeps or lights up, the wires are still live. Go back to the breaker box and try again.
Step 3: Set Up Your Multimeter
Next, grab your multimeter and set it to the appropriate setting. For testing voltage, use the AC voltage setting. If you’re checking continuity, switch it to the continuity mode. Make sure the leads are properly connected to the multimeter.
Step 4: Test the Wires
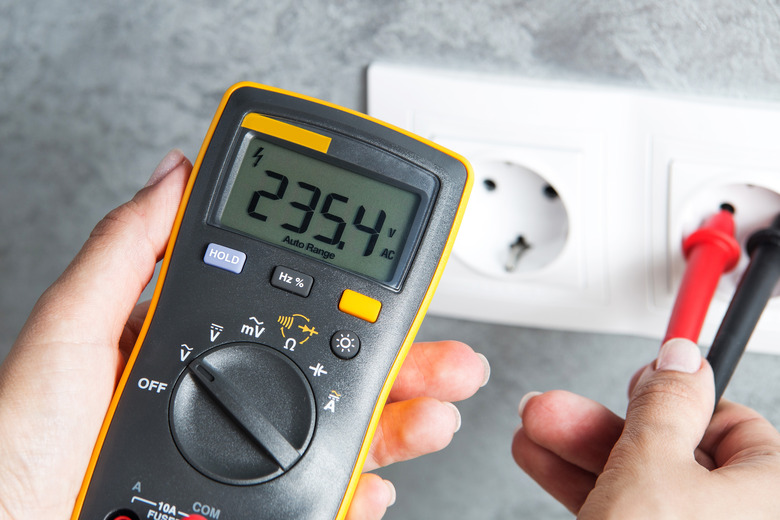
Now comes the fun part. Touch the multimeter leads to the wires you want to test. If you’re checking voltage, the multimeter will display the voltage level. For continuity tests, you’ll hear a beep if the circuit is complete. Simple, right?
Step 5: Interpret the Results
Finally, interpret what the multimeter is telling you. If the voltage reading is zero, the wire is safe to work on. If you’re testing continuity and you don’t hear a beep, there might be a break in the circuit. Use this information to troubleshoot any issues.
Common Mistakes to Avoid
Even the best of us make mistakes, but when it comes to electrical work, some errors can be downright dangerous. Here are a few common mistakes to watch out for:
- Forgetting to turn off the power: I know I already mentioned this, but it bears repeating. Always turn off the breaker before testing.
- Using damaged tools: If your multimeter or tester is broken, it might give you false readings. Regularly check your tools for damage.
- Not wearing protective gear: Gloves and safety glasses are your best friends during electrical work. Don’t skip them!
- Assuming wires are dead without testing: Just because the power’s off doesn’t mean the wires are safe. Always test them before touching.
Avoiding these mistakes will keep you safe and make your testing process smoother.
Understanding Electrical Safety Standards
When you’re working with electricity, it’s important to know the rules. Electrical safety standards are in place to protect you and others from harm. Organizations like the National Electrical Code (NEC) and OSHA set guidelines for safe electrical practices. Familiarizing yourself with these standards will help you stay compliant and avoid accidents.
For example, the NEC requires that all electrical installations meet certain criteria for safety and performance. OSHA, on the other hand, focuses on workplace safety and provides guidelines for handling electrical hazards. Knowing these standards will make you a more competent and confident electrician.
Troubleshooting Common Issues
Let’s say you’ve tested your wires and something’s not quite right. What do you do next? Here are a few common issues and how to troubleshoot them:
Problem: No Voltage Reading
If your multimeter shows zero voltage, the wire might be disconnected or the circuit breaker could be tripped. Check the connections and reset the breaker if necessary.
Problem: Inconsistent Voltage
If the voltage reading fluctuates, there might be a loose connection or a faulty device in the circuit. Inspect the wiring and replace any damaged components.
Problem: Continuity Test Fails
A failed continuity test usually means there’s a break in the wire. Use a visual inspection to find the break, or replace the wire entirely if needed.
Advanced Techniques for Testing Electrical Wires
Once you’ve mastered the basics, you might want to try some advanced techniques. These methods can help you tackle more complex electrical problems:
- Loop testing: This involves connecting two wires and testing the loop resistance to identify faults.
- Insulation resistance testing: Measures the resistance of wire insulation to ensure it’s in good condition.
- Ground testing: Checks the integrity of the grounding system to prevent electrical shocks.
These techniques require more specialized equipment, but they’re invaluable for professional electricians.
Choosing the Right Multimeter
Not all multimeters are created equal. When shopping for one, look for features like auto-ranging, backlit displays, and durability. Some models come with extra functions like temperature measurement or frequency testing, which can be useful depending on your needs.
Popular brands like Fluke, Klein, and Amprobe offer high-quality multimeters that are perfect for both beginners and pros. Do your research and choose a model that fits your budget and requirements.
Final Thoughts: Stay Safe and Keep Learning
There you have it—a comprehensive guide to testing electrical wires. Remember, safety is the number one priority, so always follow proper procedures and use the right tools. With practice, you’ll become more confident in your abilities and tackle even the toughest electrical challenges.
Now it’s your turn! If you’ve learned something new from this guide, share it with a friend or leave a comment below. And don’t forget to check out our other articles for more tips and tricks on all things electrical. Happy wiring, and stay safe out there!
Table of Contents
- Why Testing Electrical Wires Matters
- Essential Tools for Testing Electrical Wires
- Step-by-Step Guide to Testing Electrical Wires
- Common Mistakes to Avoid
- Understanding Electrical Safety Standards
- Troubleshooting Common Issues
- Advanced Techniques for Testing Electrical Wires
- Choosing the Right Multimeter
- Final Thoughts: Stay Safe and Keep Learning
Article Recommendations